宝塔面板管理命令

查看宝塔日志:cat /tmp/panelBoot.pl
查看软件安装日志:cat /tmp/panelExec.log
站点配置文件位置:/www/server/panel/vhost
删除域名绑定面板:rm -f /www/server/panel/data/domain.conf
清理登陆限制:rm -f /www/server/panel/data/*.login
查看面板授权IP:cat /www/server/panel/data/limitip.conf
关闭访问限制:rm -f /www/server/panel/data/limitip.conf
查看许可域名:cat /www/server/panel/data/domain.conf
关闭面板SSL:rm -f /www/server/panel/data/ssl.pl && /etc/init.d/bt restart
查看面板错误日志:cat /tmp/panelBoot
查看数据库错误日志:cat /www/server/data/*.err
站点配置文件目录(nginx):/www/server/panel/vhost/nginx
站点配置文件目录(apache):/www/server/panel/vhost/apache
站点默认目录:/www/wwwroot
数据库备份目录:/www/backup/database
站点备份目录:/www/backup/site
站点日志:/www/wwwlogs

查看当前面板端口:cat /www/server/panel/data/port.pl

查看当前面板端口:cat /www/server/panel/data/port.pl
修改面板端口,如要改成8881(centos 6 系统)

1

2

3

4

echo '8881' > /www/server/panel/data/port.pl && /etc/init.d/bt restart

iptables -I INPUT -p tcp -m state --state NEW -m tcp --dport 8881 -j ACCEPT

service iptables save

service iptables restart

修改面板端口,如要改成8881(centos 7 系统)

1

2

3

echo '8881' > /www/server/panel/data/port.pl && /etc/init.d/bt restart

firewall-cmd --permanent --zone=public --add-port=8881/tcp

firewall-cmd --reload

强制修改MySQL管理(root)密码,如要改成123456:cd /www/server/panel && python tools.pyc root 123456
修改面板密码,如要改成123456:cd /www/server/panel && python tools.pyc panel 123456
Nginx管理命令

nginx安装目录:/www/server/nginx
启动:/etc/init.d/nginx start
停止:/etc/init.d/nginx stop
重启:/etc/init.d/nginx restart
启载:/etc/init.d/nginx reload
nginx配置文件:/www/server/nginx/conf/nginx.conf
Apache管理命令

apache安装目录:/www/server/httpd
启动:/etc/init.d/httpd start
停止:/etc/init.d/httpd stop
重启:/etc/init.d/httpd restart
启载:/etc/init.d/httpd reload
apache配置文件:/www/server/apache/conf/httpd.conf
MySQL管理命令

mysql安装目录:/www/server/mysql
phpmyadmin安装目录:/www/server/phpmyadmin
数据存储目录:/www/server/data
启动:/etc/init.d/mysqld start
停止:/etc/init.d/mysqld stop
重启:/etc/init.d/mysqld restart
启载:/etc/init.d/mysqld reload
mysql配置文件:/etc/my.cnf
FTP管理命令

ftp安装目录:/www/server/pure-ftpd
启动:/etc/init.d/pure-ftpd start
停止:/etc/init.d/pure-ftpd stop
重启:/etc/init.d/pure-ftpd restart
ftp配置文件:/www/server/pure-ftpd/etc/pure-ftpd.conf
PHP管理命令

php安装目录:/www/server/php
启动(请根据安装PHP版本号做更改,例如:/etc/init.d/php-fpm-54 start):

/etc/init.d/php-fpm-{52|53|54|55|56|70|71} start

停止(请根据安装PHP版本号做更改,例如:/etc/init.d/php-fpm-54 stop):

1

/etc/init.d/php-fpm-{52|53|54|55|56|70|71} stop

重启(请根据安装PHP版本号做更改,例如:/etc/init.d/php-fpm-54 restart):

1

/etc/init.d/php-fpm-{52|53|54|55|56|70|71} restart

启载(请根据安装PHP版本号做更改,例如:/etc/init.d/php-fpm-54 reload):

1

/etc/init.d/php-fpm-{52|53|54|55|56|70|71} reload

配置文件(请根据安装PHP版本号做更改,例如:/www/server/php/52/etc/php.ini):

1

/www/server/php/{52|53|54|55|56|70|71}/etc/php.ini

Redis管理命令

redis安装目录:/www/server/redis
启动:/etc/init.d/redis start
停止:/etc/init.d/redis stop
redis配置文件:/www/server/redis/redis.conf
Memcached管理命令

memcached安装目录:/usr/local/memcached
启动:/etc/init.d/memcached start
停止:/etc/init.d/memcached stop
重启:/etc/init.d/memcached restart
启载:/etc/init.d/memcached reload

typecho 博客程序底部添加 跳动的鱼特效


具体效果查看本博客。。。
可自动更改显示的内容。。。
代码:
添加到博客主题的 footer.php 文件中

<!– 页脚 –>
<footer>
<div class="site-footer">
<div style="color: rgb(137, 137, 140);font-size:0.9em;" class="footer-container rm-link-color">
<p>
<!– 加载时间 –>
<script>
var start_time = new Date();
var end_time = "";
var loadt = setInterval(function () {
if (document.readyState == "complete") {
showLoadTime();
}
}, 500)

                function showLoadTime() {
                    end_time = new Date();
                    loadtime_span.innerHTML = "T " + (end_time.getTime() - start_time.getTime()) + " ms";
                    clearInterval(loadt);
                }
            </script>
            <!-- IP -->
            <span id="ip_span" align=center></span>
            <script type="text/javascript">;
                    function handleIpCallback(res) {
                    returnCitySN = res
                    ip_span.innerHTML = (returnCitySN["city"] || returnCitySN["province"]) + returnCitySN["isp"] + " " + returnCitySN["ip"];
                }
                </script>
                <script type="text/javascript" src="https://ip.useragentinfo.com/jsonp?callback=handleIpCallback"></script>

            <span class="mx-2">|</span>

            <span id="loadtime_span"></span>

        <!-- 声明 -->
       <div class="row">
                <div class="col-sm-12">
                    <span> Copyright &copy; <?php echo date("Y"); ?> <a href="<?php $this->options->siteUrl(); ?>" target="_blank"><?php $this->options->title(); ?></a></span><br />
                    <span>Powered by <a rel="noopener" href="https://typecho.org/" target="_blank">Typecho</a> | Theme by <a rel="noopener" href="https://github.com/dingzd1995/typecho-theme-waxy" target="_blank">Waxy</a><?php add_ICP($this); ?>
<p></span><br />
                </div>
            </div>
    </div>
</div>
<div id="flyfish" class="fly-fish" height="200"></div>

</footer>

<script src="https://ooolo.net/usr/themes/waxy/js/fish.js"></script>

css:

    .site-footer {
    margin:0;
    /margin-top:64px;/
    padding-top:30px;
    padding-bottom:30px;
    color:hsla(0,0%,100%,.9);
    box-sizing:inherit;
    text-align:center;
    font-size:1em
    }
    @media (max-width:991px){
    .site-footer {
    padding-top:0px;
    }
    }
    .site-footer p {
    margin:0
    }
    .rm-link-color > p > a {
    text-decoration:none;
    color:#89898c
    }
    .rm-link-color > p > a:hover {
    text-decoration:underline
    }

    .fly-fish{
    z-index: -1;
    line-height: 0px;
    height: 350px;
    }
    footer{
    position: relative;
    }
    .site-footer{
    position: absolute;
    width: 100%;
    top: calc(100% / 4 * 3);
    transform: translateY(calc(-50% + 10%));
    padding: 0;
    }

    .App{
    padding-bottom: 0;
    }
    @media (max-width: 767px){
    .App{
    padding-bottom: 0;
    }
    .App-content {
    padding-bottom: 0;
    }
    }

MybatisPlus的分页插件会自动优化LeftJoin语句

MybatisPlus的分页插件会自动优化LeftJoin语句,官网上说明,当LeftJoin的表没有参与Where查询时,会自动移除。
会导致查询的sql总数和实际数据不一致

解决方案: 配置

paginationInnerInterceptor.setOptimizeJoin(false);

为false即可不消除leftjoin

 @Bean
    public MybatisPlusInterceptor mybatisPlusInterceptor() {
        MybatisPlusInterceptor interceptor = new MybatisPlusInterceptor();
        PaginationInnerInterceptor paginationInnerInterceptor = new PaginationInnerInterceptor(DbType.getDbType(dbType));
        // 关闭生成 countSql 优化掉 join
        paginationInnerInterceptor.setOptimizeJoin(false);
        interceptor.addInnerInterceptor(paginationInnerInterceptor);
        interceptor.addInnerInterceptor(new OptimisticLockerInnerInterceptor());
        return interceptor;
    }

cdn解决端口限制

设置cdn服务
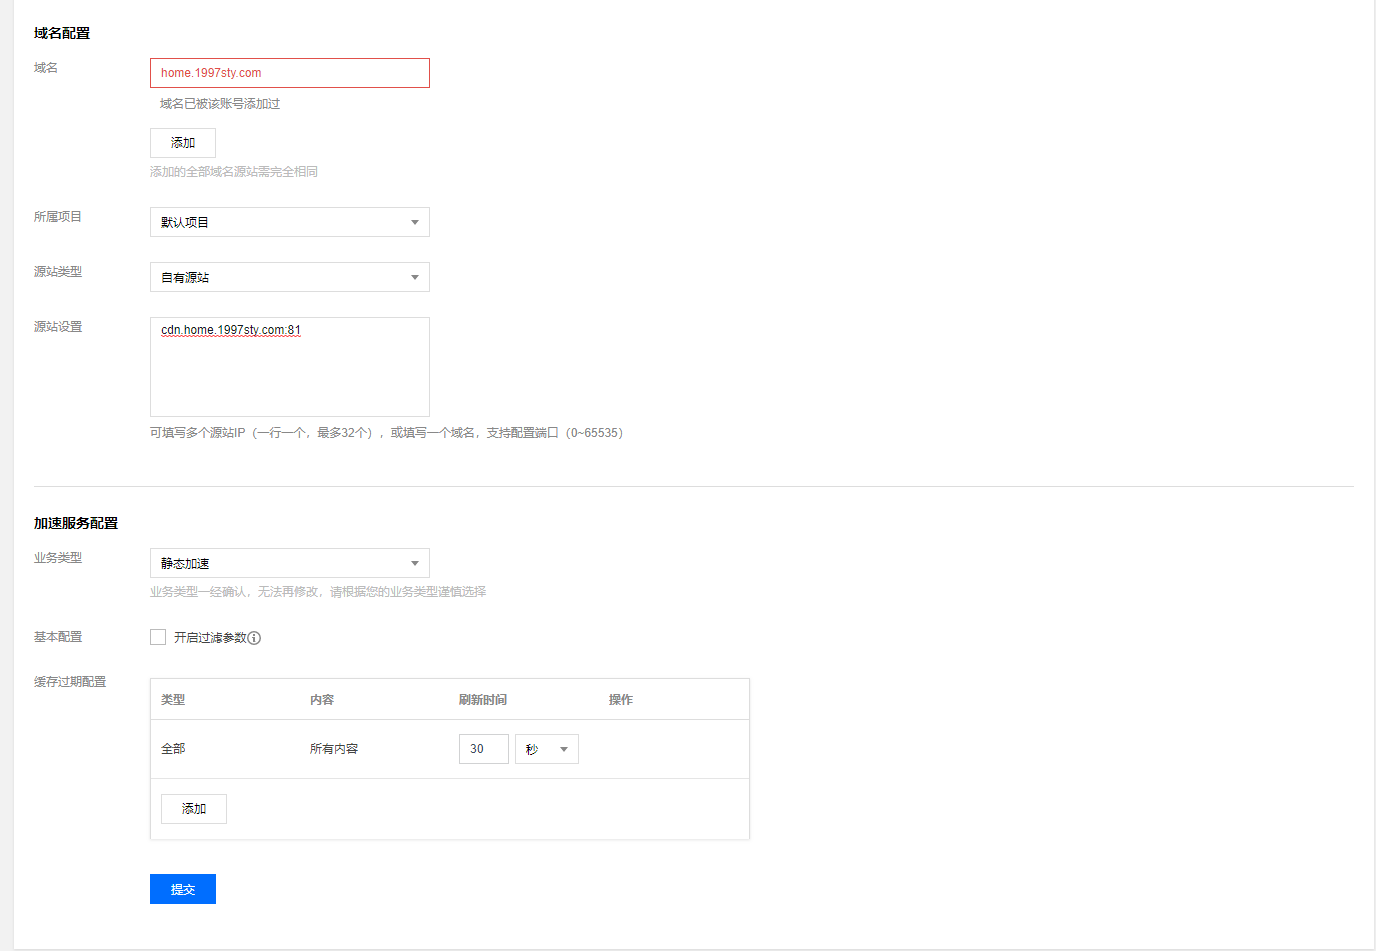
cdn我选择的是腾讯云的,具体设置参考官方文档(点我).而你需要准备的东西有2个,一个是家用宽带的域名,一个是cdn使用的域名.

cdn.home.1997sty.com:81这个域名我指向的是家用宽带的ip地址,也就是api接口实时更新解析记录的地址
home.1997sty.com这个域名我指向的是cdn服务器,是正式访问的地址

设置完成后,自动启动,过几分钟就能用正式访问的地址访问网站,因为设置81端口,记得在源站设置的时候加上端口号

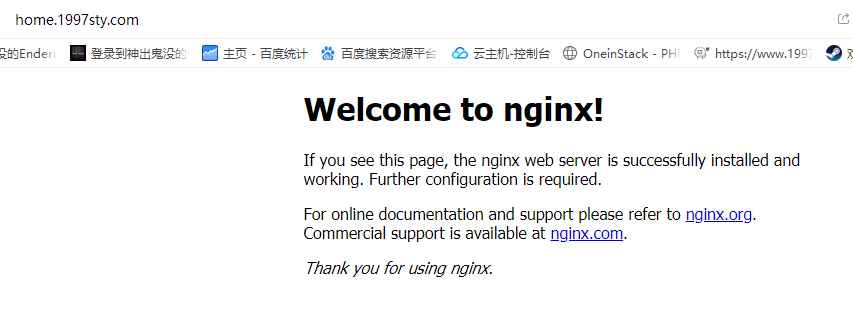
外网访问效果

设置强制https
按照下图配置,不需要在nginx上操作,只需要设置cdn即可
ssl证书可以点击sll证书管理去申请,反正有免费的
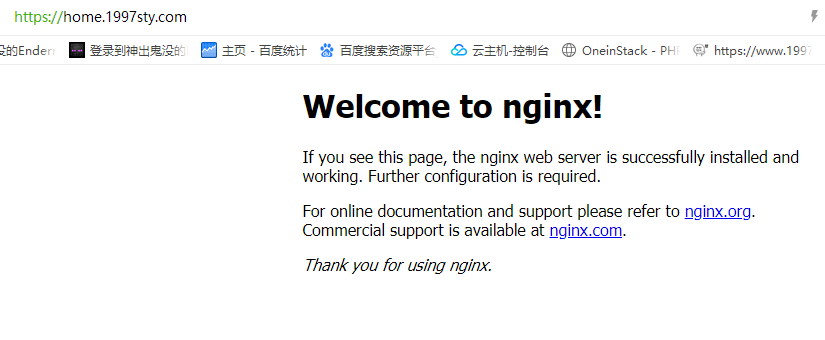
设置完成后过几分钟再访问,会将请求强制跳转到https

访问效果

openwrt旁路由如何设置动态dns

我们申请的宽带公网ip,一般每隔一段时间就会改变,
所以这时就用到了动态dns

我使用的是腾讯云的域名和DNSPOD
1.首先需要打开 DNSPOD
https://www.dnspod.cn/
在里面创建一个密钥


然后添加一个二级域名的解析记录
随便添加一个A记录 默认指向 1.1.1.1 就行,后面会自动覆盖

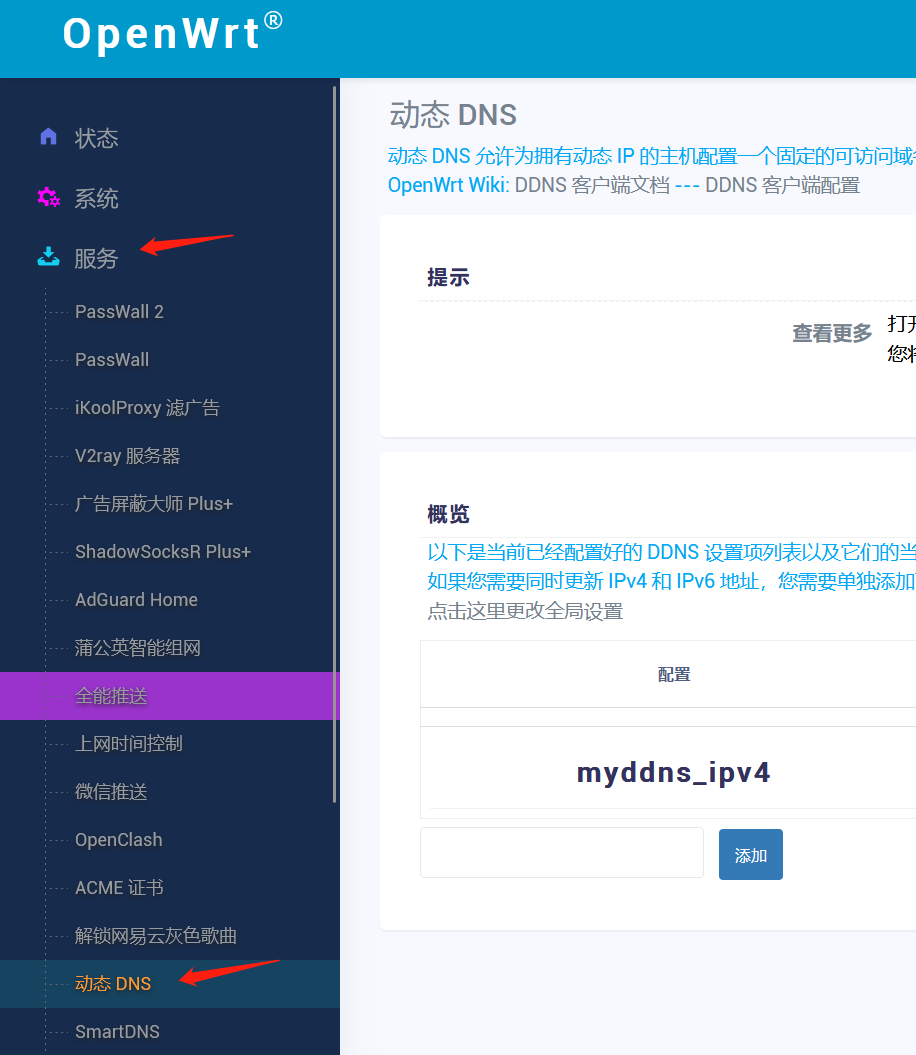
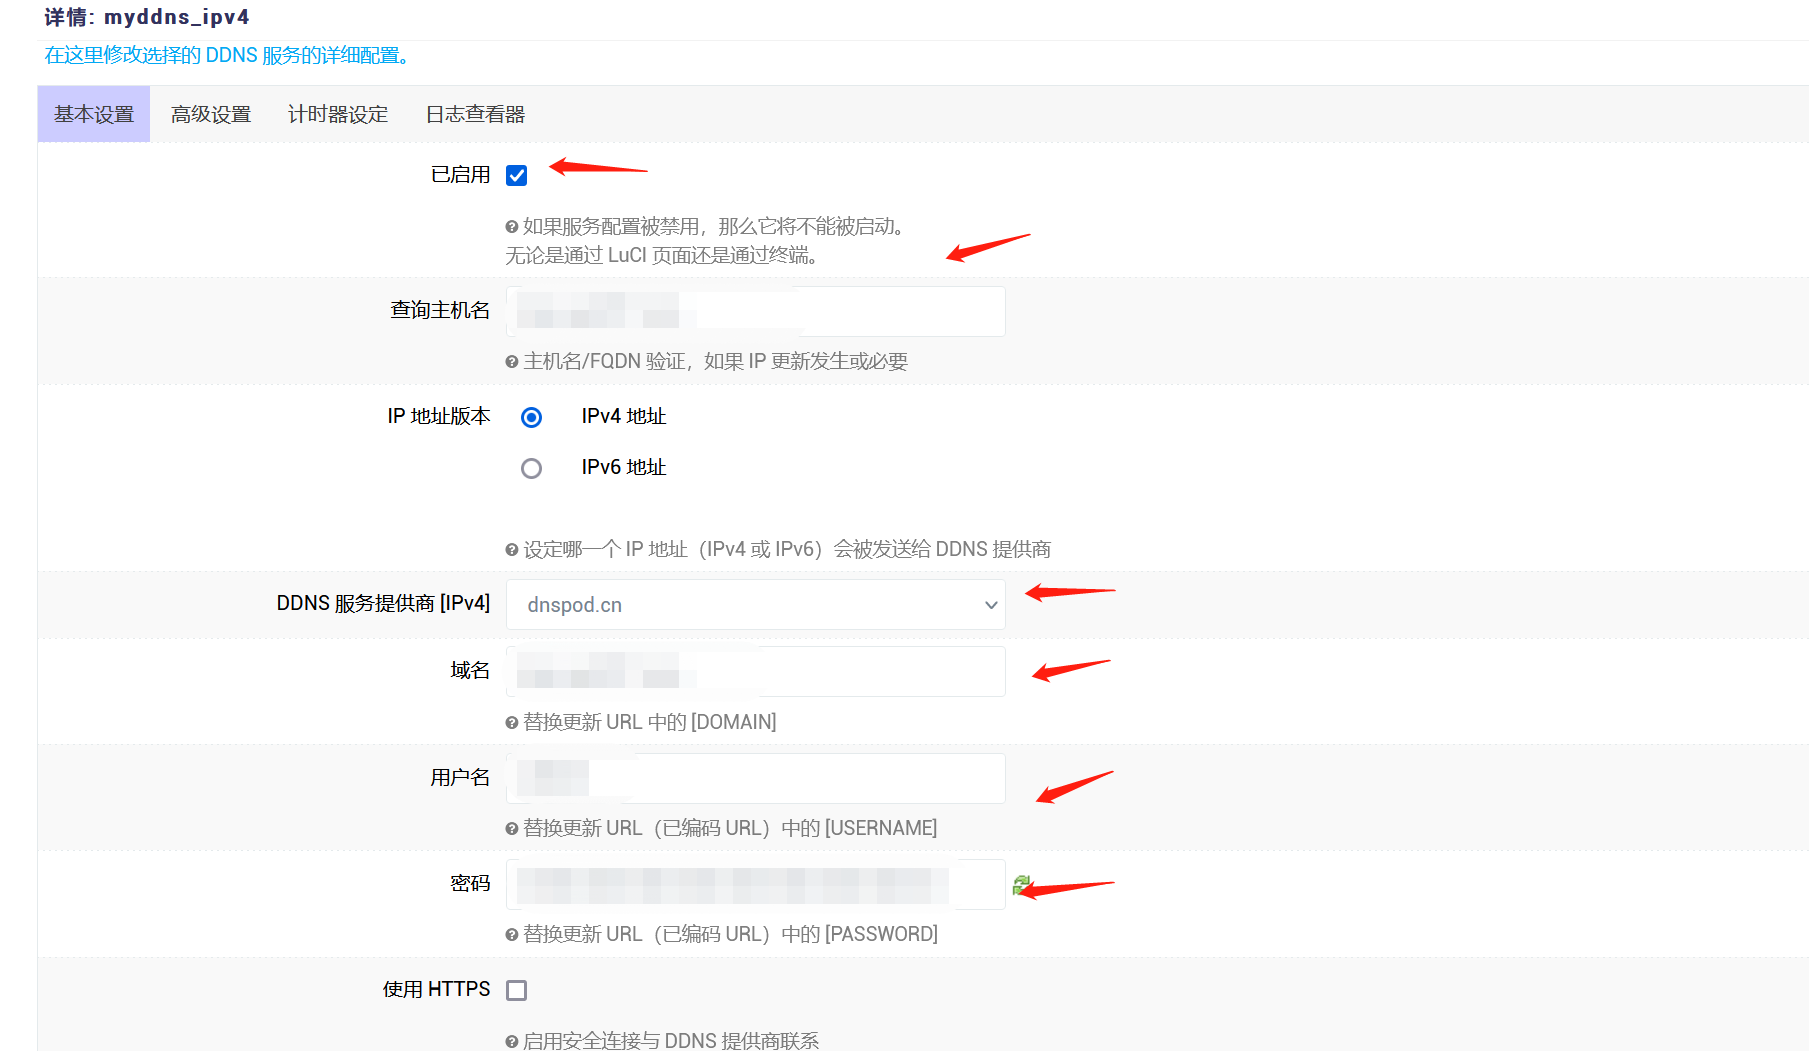
2.首先在openwrt的 服务 里面找到 动态dns

随便命个名称,点击 “添加”


查询主机名和域名项都写 你自己的域名解析的域名
用户名和密码填 DNSPod 上面申请到的密钥

按照我图片上面的设置就行
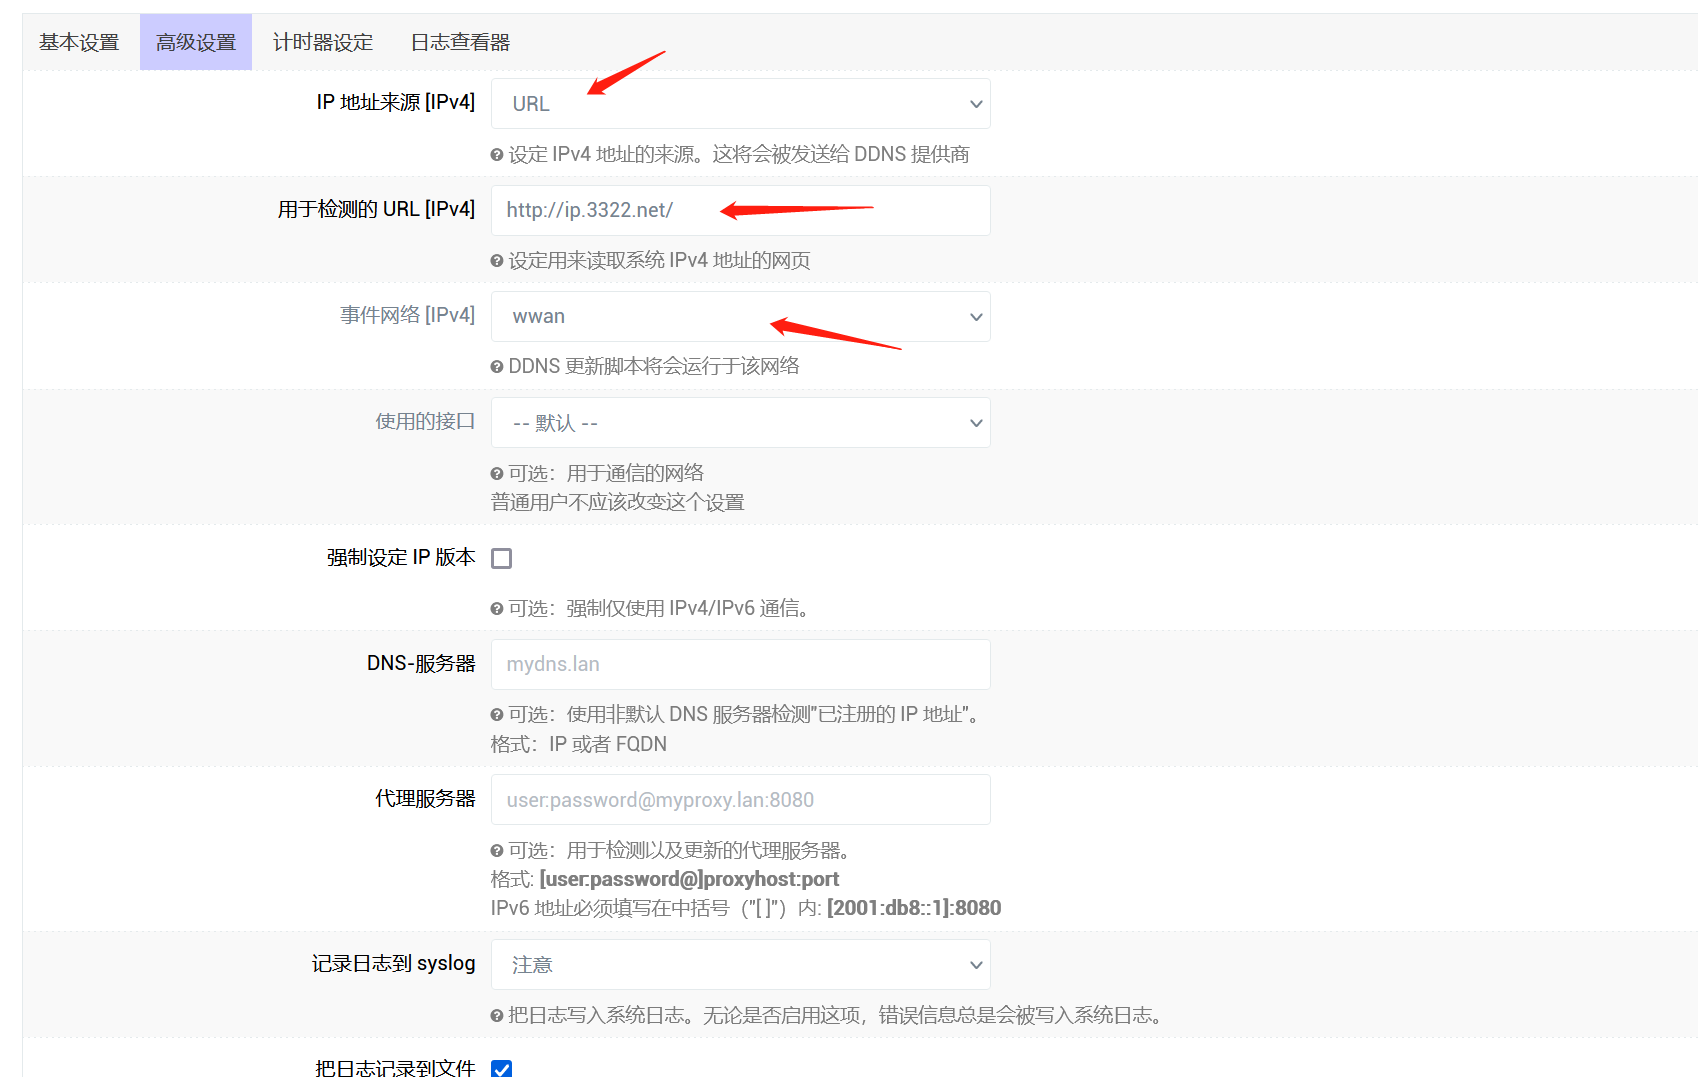
然后再点击“高级设置”
如图:


URL 可以使用:

http://ip.3322.net/

因为我是用openwrt连接的主路由wifi的形式所以可以选择“wwan”
别的默认就行
点击保存&应用就行

后面如何ip变了会自动更新到域名解析记录的